The MS3D-UD Multi Solar Controller from AsconPool automatically manages your pool’s solar heating system by monitoring temperature differences between your solar panels and pool water. This guide covers installation, setup, and operation.
Package Contents and Tools Required
Your system includes the solar controller unit, up pipe sensor, down pipe sensor, and mounting kit with screws.
You’ll need a drill with hammer action, a 6mm masonry bit (for wall mounting), a 12.5mm drill bit (for sensors), and a P-2 Phillips screwdriver.
Installation Guidelines
Positioning the Controller
Critical placement requirements ensure safe, effective operation:
- Install 3.5 metres from the pool zone (safety requirement)
- Position within 1.5 metres of your pump
- Mount upright, 1 metre above ground
- Use only the provided mounting screws
- Keep away from direct water splash
Never immerse the unit, install upside down, or place it where the pool spray can reach it.
Installing Temperature Sensors
Up Pipe Sensor (monitors solar panel water):
- Drill a 12.5mm hole in the pipe from the solar panels
- Insert the rubber grommet first
- Push the sensor through the grommet
- Connect the cable using red connectors
Down Pipe Sensor (monitors pool water):
- Drill a 12.5mm hole in the pipe going to the solar panels
- Insert the grommet, then the sensor
- Connect the cable via the red connectors
Power Connections
Stand-Alone System:
- Plug the controller into a power outlet
- Plug the solar pump into the controller base
Integrated System (with chlorinator):
- Plug the chlorinator into the power outlet
- Connect the controller’s grey plug to the chlorinator
- Plug the filter pump into the grey connector
- Plug the solar pump into the controller base
Initial Setup
First Power-On
The unit follows an automatic startup sequence:
- 2-minute synchronisation with flashing light
- 6-minute sensor reset run
- “Set Time” LED flashes for clock setup
Setting the Clock
Use ← the button for hours and → button for minutes. The controller operates on 24-hour time (e.g., 4 pm = 16:00).
Operating Your Controller
Comfort Temperature (20°C–40°C)
This is your target pool temperature:
- Press → to increase by 1°C
- Press ← to decrease by 1°C
- Setting is stored when powered off
Typical settings: 26-28°C for comfortable swimming, 30-32°C for spa-like warmth, 24-26°C for lap swimming.
Differential Temperature
This determines when the system activates based on the temperature difference between the panels and the pool:
- Press →, WINTER, and DISPLAY simultaneously
- The display shows “dIF” with the current setting
- Use → to increase, ← to decrease
Recommended: 4-6°C for standard conditions. Higher differentials (6-8°C) suit sunny climates; lower settings (3-4°C) work better in cloudy conditions.
Finish Time
The controller operates from 8:00 am to a set finish time (default 4:00 pm):
- Press ← and DISPLAY together
- Display shows “Fin”
- Use ← for hours, → for minutes
Between finish time and 8:00 am, the display shows “Nop” (not operating). Extend to 6:00 pm during summer or reduce to 3:00 pm in cooler months.
Display Mode
Check all settings without changing them by pressing DISPLAY. The unit cycles through:
- U – Up pipe (panel) temperature
- d – Down pipe (pool) temperature
- L – Last up pipe temperature
- C – Comfort setting
- H – Clock hours
- M – Clock minutes
Winter Mode
Activate winter mode to maintain system health during cooler months without heating:
- Press WINTER at season’s end
- Press WINTER again when swimming season returns
This prevents water stagnation and extends system life.
Override Function
Manually run the system regardless of conditions:
- 1-hour override: Press ← and → together
- 4-hour override: Hold ← and → for 5 seconds
- Cancel: Press both buttons again
Calibration
Fine-tune sensor readings:
Down sensor: Press WINTER + ←, display shows “CAd”, adjust with arrow buttons
Up sensor: Press WINTER + →, display shows “CAU”, adjust with arrow buttons
Resetting the Clock
- Hold WINTER + DISPLAY until “Set” appears
- Use ← for hours, → for minutes
How It Works
The MS3D-UD monitors both sensors continuously. When the current time is between 8:00 am and the finish time, and the panel temperature exceeds the pool temperature by your set differential, the pump activates. The system stops when the pool reaches comfort temperature, panels cool down, or the finish time is reached.
This intelligent operation maximises heating efficiency while minimising energy waste.
Troubleshooting
No Display
- Check the power outlet/chlorinator connection
- Verify the circuit breaker hasn’t tripped
- Ensure all plugs are fully inserted
“EuP” Error (Up Pipe Sensor Fault)
- Check the red connector connections
- Swap sensor connectors to test
- Replace the sensor if the fault persists
“Edn” Error (Down Pipe Sensor Fault)
- Follow the same steps as the “EuP” error
- Focus on down pipe sensor connections
“EEE” Error
- Internal system error
- Return unit for professional service
Pump Not Running
- Verify the solar pump is plugged into the controller base
- Check time is between 8:00 am and the finish time
- Test with override function
- Confirm panel temperature exceeds pool temperature plus differential
Maintenance Tips
Regular checks:
- Weekly: Verify display shows reasonable temperatures
- Monthly: Clean the controller with a dry cloth, inspect connections
- Seasonally: Adjust finish time, activate/deactivate winter mode
For maximum efficiency:
- Set the differential to 5-6°C typically
- Use a pool cover to retain heat
- Don’t set the comfort temperature higher than needed
- Match finish time to seasonal daylight patterns
When to Seek Help
Contact AsconPool or your installer if error code “EEE” appears, sensor errors persist after checking connections, or the controller shows physical damage.
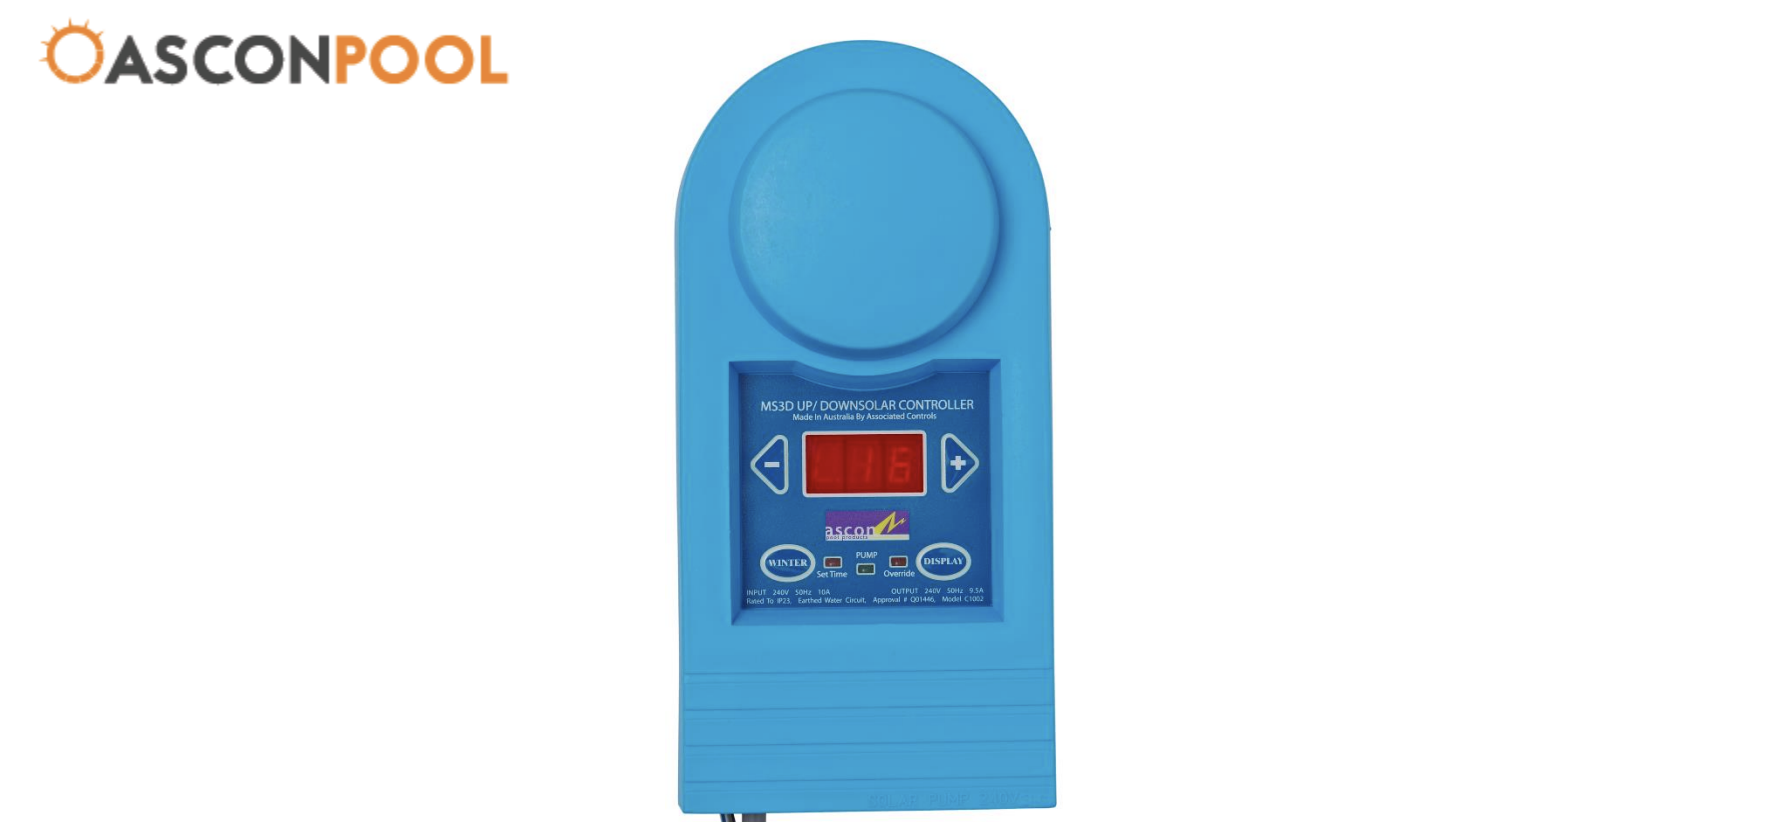
Technical Specifications:
- Input: 240V 50Hz 10A
- Output: 240V 50Hz 9.5A
- IP23 rated (water spray protected)
- Model C1002, Approval Q01446